
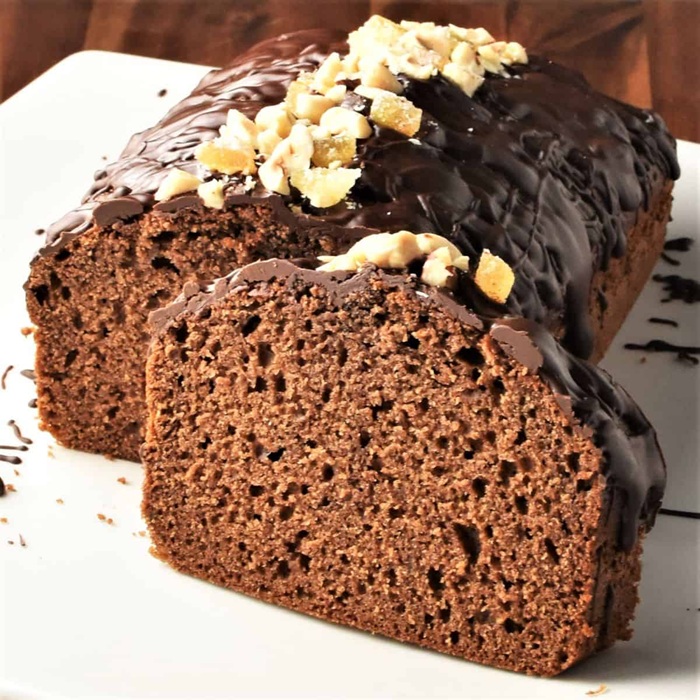
Piernik (Polish Gingerbread)
Piernik (Polish Gingerbread) is a classic Polish dessert that holds a distinguished place in traditional cooking. Celebrated for its wholesome ingredients and time-honored preparation, this dish brings authentic regional character to the home kitchen.
Carefully baked or prepared featuring Unsalted Butter, Clear Honey, Brown Sugar, Self-raising Flour, Ground Ginger, Ground Cinnamon, Ground Clove, Ground Nutmeg, Pepper, Egg, Plum Jam, Double Cream, Dark Chocolate and Clear Honey, the components balance delicate sweetness and satisfying texture.
Enjoy warm or chilled alongside fresh vanilla custard, whipped cream, or a freshly brewed cup of coffee or tea for a comforting finish to your meal.
If you enjoy authentic Polish cooking, be sure to also explore our recipe for Mini Bundt Cakes.
Rate this recipe
Ingredients
- Unsalted Butter140g
- Clear Honey300g
- Brown Sugar100g
- Self-raising Flour375g
- Ground Ginger3 tsp
- Ground Cinnamon1 tsp
- Ground Clove1/2 teaspoon
- Ground Nutmeg1/4 tsp
- Pepper1/4 tsp
- Egg3 Large
- Plum Jam200g
- Double Cream225ml
- Dark Chocolate140g
- Clear Honey3 tablespoons
Step-by-Step Instructions
17 stepsInteractive Cook Mode: Click any step or circle to check it off as you cook.
Heat oven to 160C/140C fan/gas 3.
Grease and line the base and sides of a deep 20cm cake tin with baking parchment.
Put the honey, sugar and butter in a medium saucepan and cook over a medium heat until fully melted.
Remove from the heat and allow to cool.
Put the flour and spices in a large bowl and mix everything together.
Once the liquid ingredients have cooled, whisk in the eggs.
Pour over the dry ingredients, whisking them together to form a smooth batter – be careful not to overmix as this can lead to a dry cake.
Pour into the prepared tin and bake for 50-55 mins or until risen and a skewer inserted into the middle of the cake comes out clean.
Allow the cake to cool in the pan for 20 mins before turning out onto a wire rack to cool completely.
Once cooled, use a large serrated knife to slice the cake into 3 layers.
Spread the jam across the 2 bottom cake layers, then reassemble the cake and set aside while you make the glaze.
Put the cream, chocolate and honey in a medium pan and cook over a low-medium heat until the chocolate is melted and you have a smooth, pourable mixture.
Put the cake on a wire rack set over a parchment-lined baking tray and pour over the glaze, making sure to cover the entire cake.
Use a fish slice to carefully transfer the cake to a serving plate and allow the glaze to set.
To decorate, dust with a little edible gold powder, if you like.
Uniced, this cake will keep for up to 5 days.
Once iced, enjoy within 3 days – just keep in the fridge, but remove before serving and eat at room temperature.
👨🍳 Chef's Culinary Notes
Cultural Heritage
Piernik (Polish Gingerbread) carries a rich culinary tradition rooted in regional home cooking. Developed over generations, the recipe highlights wholesome local ingredients prepared with time-honored kitchen techniques.
Dietary Substitutions
If using instant dry yeast instead of active dry yeast, you can mix it directly into the dry ingredients without proofing first, reducing wait time by 15 minutes.
Chef Technique Tips
Always ensure liquids used to activate the yeast are comfortably lukewarm (around 38°C–42°C / 100°F–108°F); liquid that is too hot will kill the yeast, while cold liquid delays proofing. Keep the dough in a warm, draft-free spot to rise.
Recipe Feedback & Reviews
Have you tried making this recipe? Share your experience, modifications, or tips with fellow cooks!
Please log in to leave feedback on this recipe.
Community Feedback (0)
No feedback yet. Be the first to share how this recipe turned out!